Linux & Terminal Commands
Unix was an operating system developed at Bell Labs in the mid 1960’s.
Many of the innovations and design choices the original Unix team have lived on 50+ years later, including the idea of multi-user operating systems and hierarchical file systems.
- Introduction to Linux and shells
- 1.
mancommand - 2.
aliascommand - 3.
lesscommand - 4.
tailcommand - 5.
grepcommand
Introduction to Linux and shells
Unix
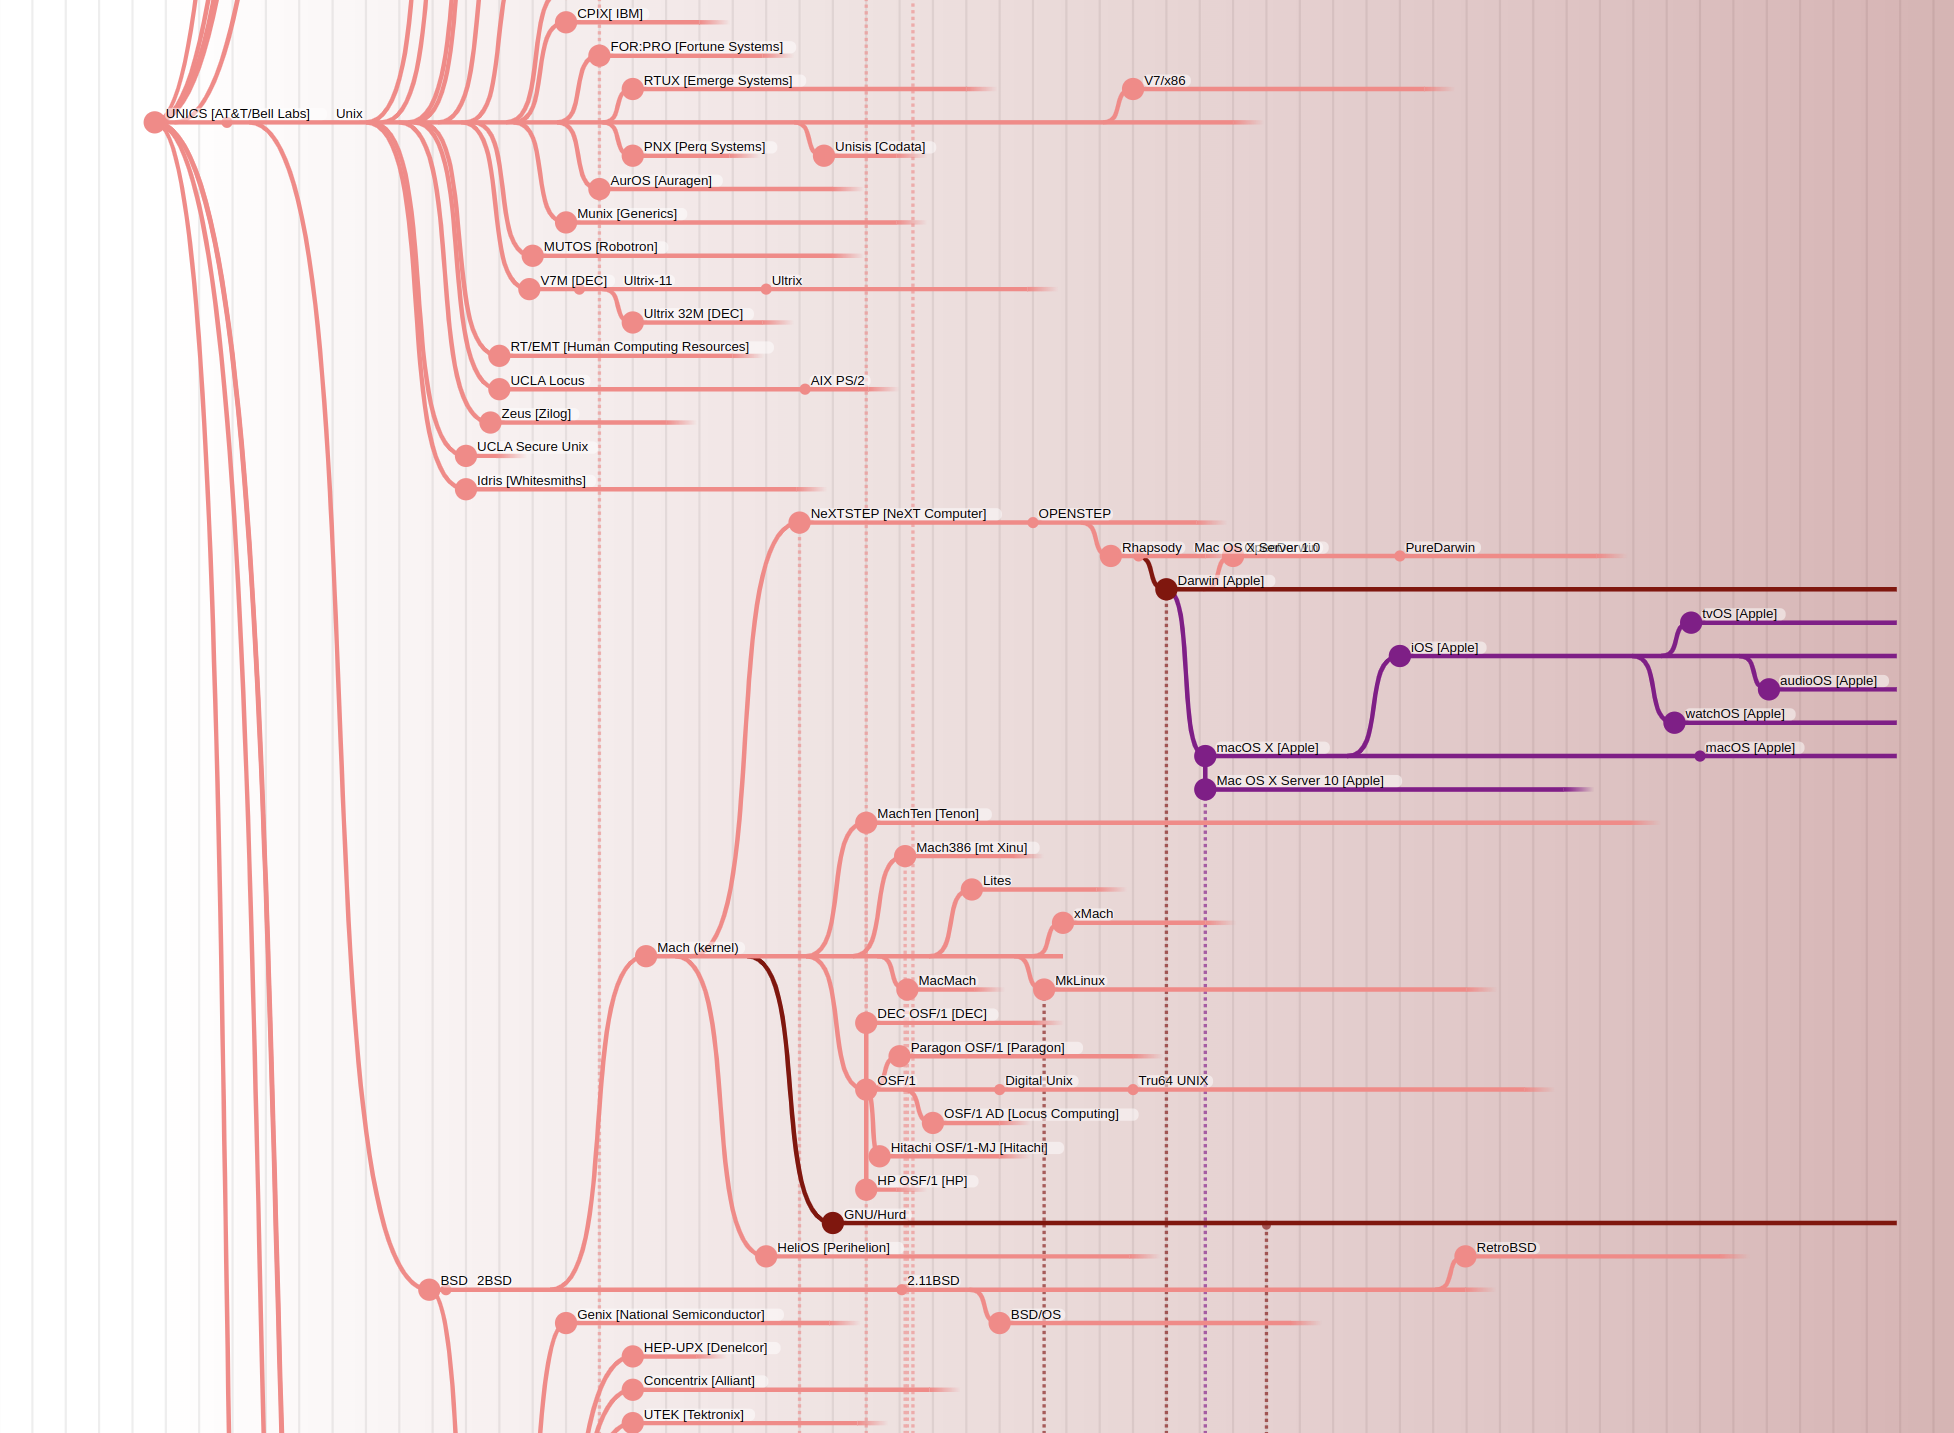
Operating Systems: Timeline and Family Tree
See the entire tree here.
Everything in red here is considered in some way related uh or indebted to Unix.
That includes things like linux, unbuntu, macOS.
Unix was an operating system developed at Bell Labs in the mid 1960’s.
Many of the innovations and design choices the original Unix team have lived on 50+ years later, including the idea of multi-user operating systems and hierarchical file systems.
Unix is the “grandfather” of many modern operating systems that we frequently use today.
Even these days most operating systems can be grouped into two families:
- The Microsoft NT descendants including Windows, Xbox OS, and Windows Phone/Mobile
- Pretty much everything else has lineage going back to Unix, including Mac OS, Linux, Android, Chrome OS, and even the PS4 OS.
Linux
GNU
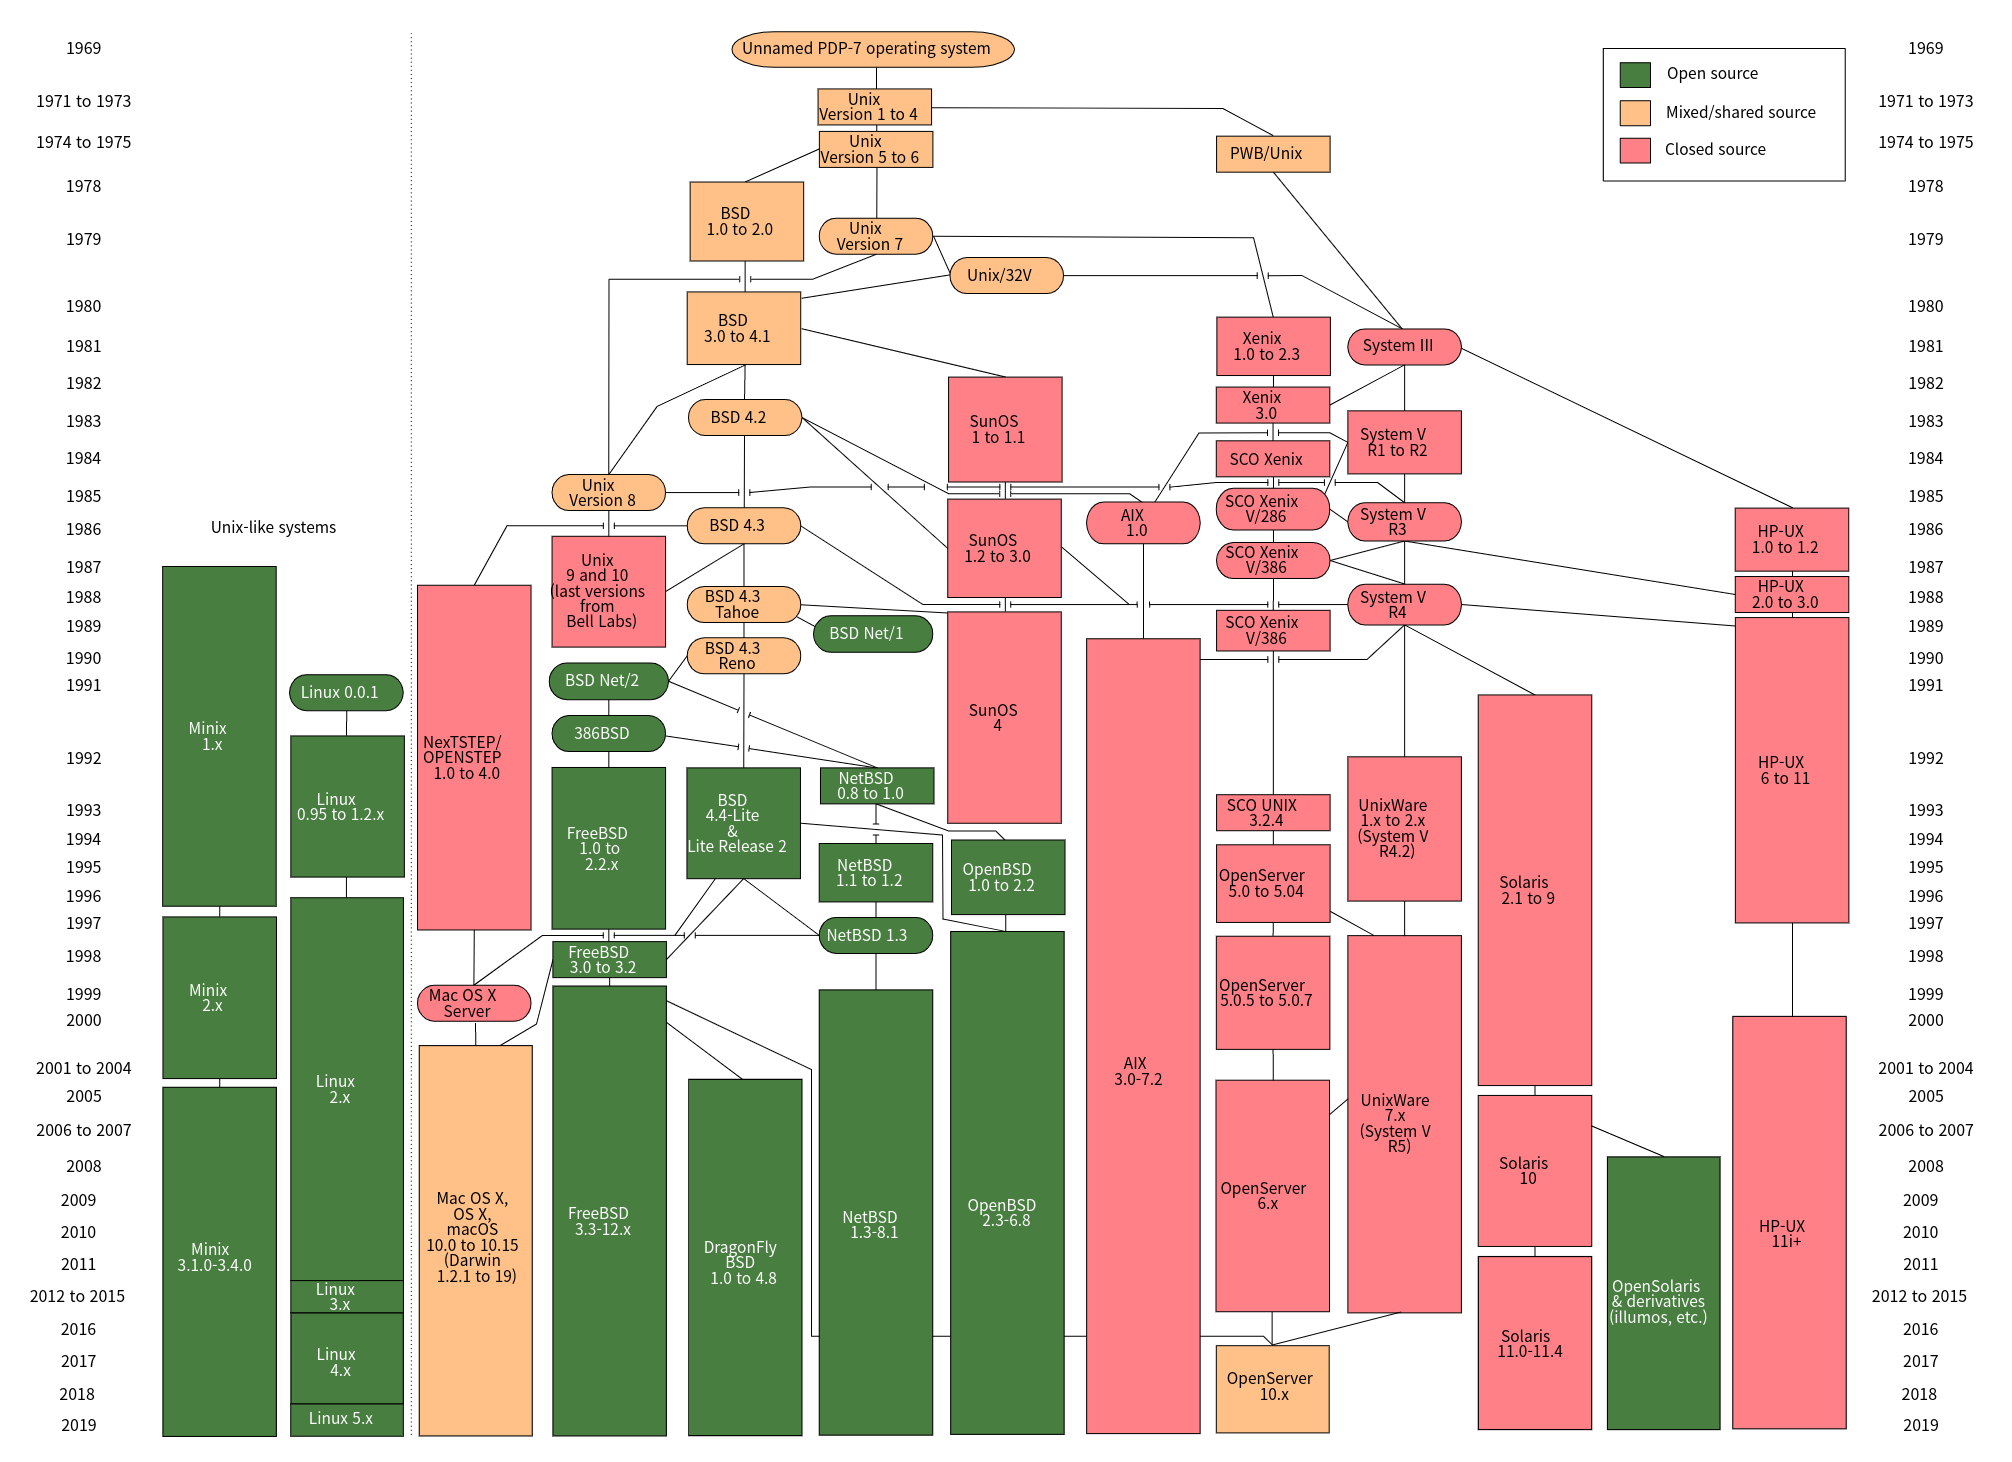
Unix_history going back to 1969 early unix versions
(pink) is closed source and that means the code is completely closed off. You can’t edit it, you can’t view it, you’re not allowed to even try to tweak it.
(green) we have open source which you may be familiar with that term. The code is openly viewable. you can change it, tweak it, make your own versions try things out.
(yellow) this is mixed/shared source type of operating system.
Richard Stallman was a leader in the group of developers who aimed to create Free Software alternatives to Unix.
In 1984 he began work on the GNU Project, with the goal of creating an operating system that included “everything useful that normally comes with a Unix system so that one could get along without any software that is not free”.
The Linux Kernel
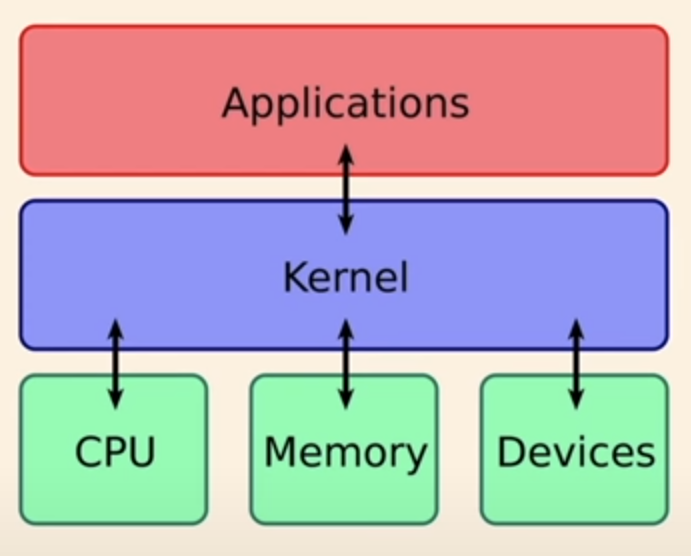
Kernel Layout
Another developer, Linus Torvalds, was working on creating his own kernel known as Linux. The kernel is the part of an OS that facilitates interactions between hardware and software.
At the time, many GNU “pieces” were complete, but it lacked a kernel. Torvalds combined his kernel with the existing GNU components to create a full operating system. This is called Linux
GNU/Linux
Linux is an operating system, like macOS or Windows.
It is also the most popular Open Source operating system, and it gives you the freedom to do whatever you want with your computer.
Linux is also special because there’s not just “one Linux”, like is the case with Windows or macOS. Instead, we have distributions. For example you have Debian, Red Hat, and Ubuntu, probably the most popular distributions.
If you use a Mac, you just need to know that under the hood macOS is a UNIX Operating System. It shares a lot of the same ideas and software that a GNU/Linux system uses, because GNU/Linux is a free alternative to UNIX.
Microsoft has an official Windows Subsystem for Linux which you can (and should!) install on Windows. This will give you the ability to run Linux in a very easy way on your PC.
UNIX is an umbrella term that groups many operating systems used in big corporations and institutions, starting from the 70’s.
Linux shell
A shell is a command interpreter that exposes an interface to the user to work with the underlying operating system.
It allows you to execute operations using text and commands, and it provides users advanced features like being able to create scripts.
Shells let you perform things in a more optimized way than a GUI (Graphical User Interface) could ever possibly let you do. Command line tools can offer many different configuration options without being too complex to use.
Many different kind of shells were created for those systems over time, and a few of them dominate the space: Bash, Csh, Zsh, Fish and many more!
All shells originate from the Bourne Shell, called sh. “Bourne” because its creator was Steve Bourne.
Bash means Bourne-again shell. sh was proprietary and not open source, and Bash was created in 1989 to create a free alternative for the GNU project and the Free Software Foundation. Since projects had to pay to use the Bourne shell, Bash became very popular.
If you use a Mac, try opening your Mac terminal. By default it runs ZSH (or, pre-Catalina, Bash).
You can set up your system to run any kind of shell.
Each single shell has its own unique features and advanced usage, but they all share a common functionality: they can let you execute programs, and they can be programmed.
1. man command
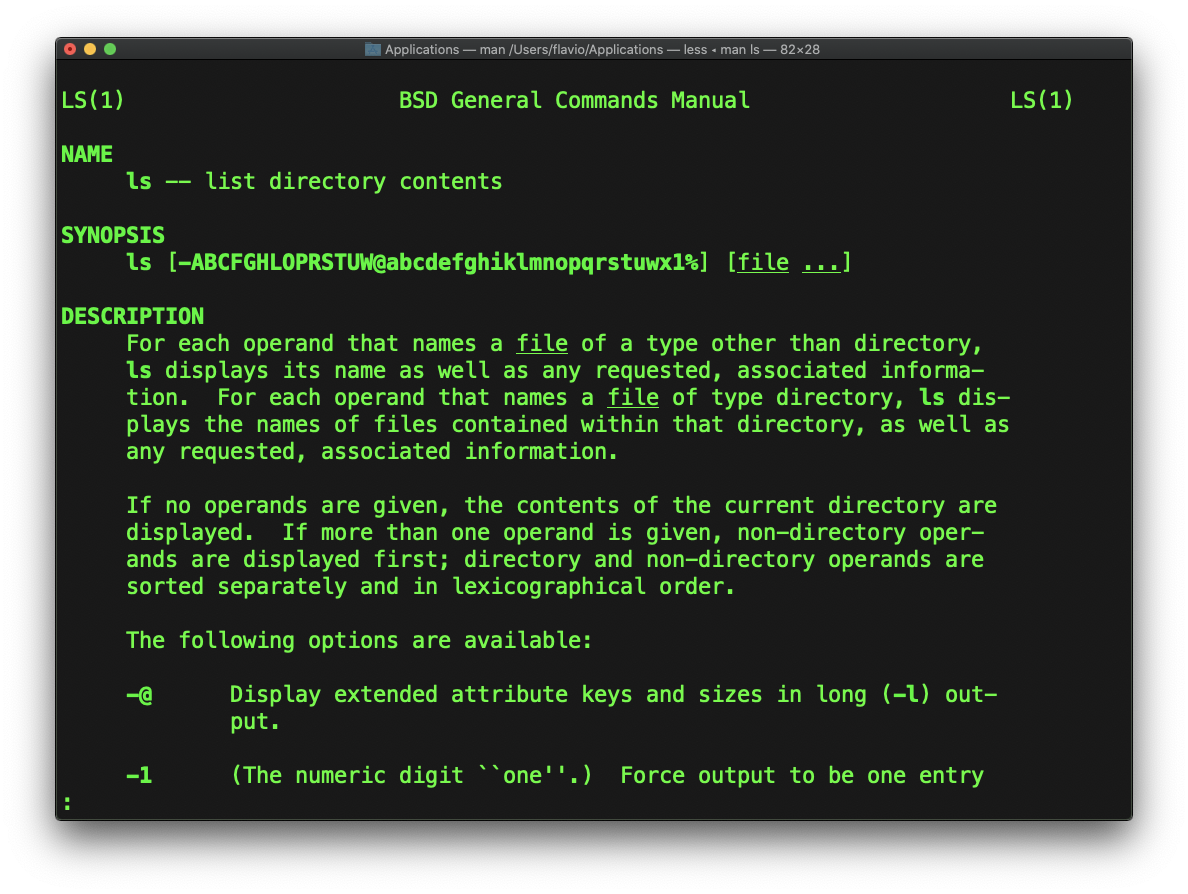
man ls result
Every time we don’t know how to use a command, We can type man <command> to get the manual.
Then you can use the man page to explore all the different options and parameters you can use on a command.
tldr
When need to learn a command quickly we can use this site called tldr pages: https://tldr.sh {:target=_“blank”} (Is tldr an abbreviation for Too Long Don’t Read? lol)
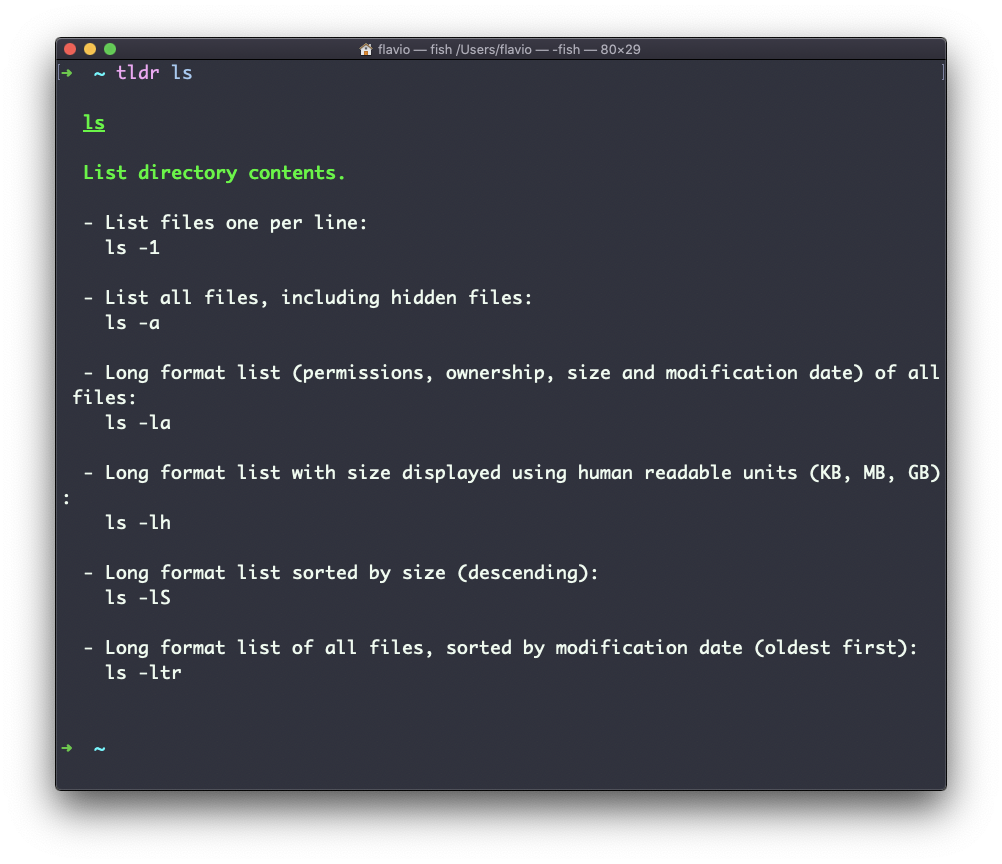
tldr ls result
It’s a command you can install, which you then run like this: tldr
2. alias command
You can create a new command, for example I like to call it ls -al to ll, You can do it like this:
alias ll='ls -al'
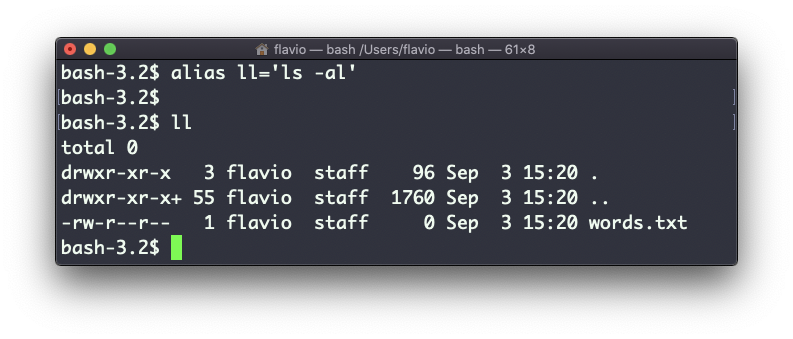
alias ll result
The alias will work until the terminal session is closed.
To make it permanent, you need to add it to the shell configuration. This could be ~/.bashrc or ~/.profile or ~/.bash_profile if you use the Bash shell, depending on the use case. And apply the created file using the following command.
source ~/.bash_profile
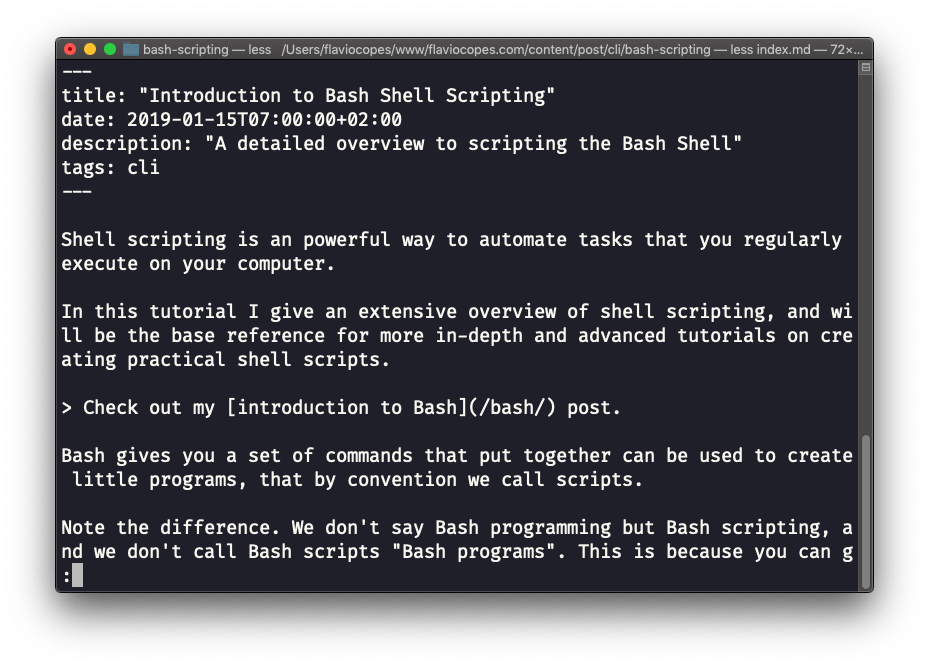
3. less command
It shows you the content stored inside a file, in a nice and interactive UI.
Usage: less <filename>
Once you are inside a less session, you can quit by pressing q.
You can navigate the file contents using the up and down keys, or using the space bar and b to navigate page by page. You can also jump to the end of the file pressing G and jump back to the start by pressing g.
You can search contents inside the file by pressing / and typing a word to search. This searches forward. You can search backwards using the ? symbol and typing a word.
This command just visualises the file’s content. You can directly open an editor by pressing v. It will use the system editor, which in most cases is vim.
Pressing the F key enters follow mode, or watch mode. When the file is changed by someone else, like from another program, you get to see the changes live.
This doesn’t happen by default, and you only see the file version at the time you opened it. You need to press ctrl-C to quit this mode. In this case the behaviour is similar to running the tail -f <filename> command.
You can open multiple files, and navigate through them using :n (to go to the next file) and :p (to go to the previous).
4. tail command
The best use case of tail in my opinion is when called with the -f option. It opens the file at the end, and watches for file changes.
Any time there is new content in the file, it is printed in the window. This is great for watching log files, for example:
tail -f /var/log/system.log
To exit, press ctrl-C.
You can print the last 10 lines in a file:
tail -n 10 <filename>
You can print the whole file content starting from a specific line using + before the line number:
tail -n +10 <filename>
tail can do much more and as always my advice is to check man tail.
5. grep command
When you master grep command, it will help you tremendously in your day to day coding. You can use grep to search in files, or combine it with pipes to filter the output of another command. For example here’s how we can find the occurences of the document.getElementById line in the index.md file:
grep -n document.getElementById index.md
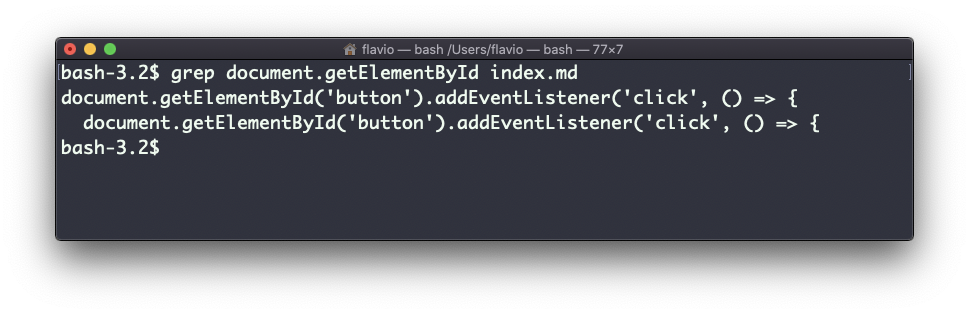
Using the -n option it will show the line numbers:
grep -n document.getElementById index.md
One very useful thing is to tell grep to print 2 lines before and 2 lines after the matched line to give you more context. That’s done using the -C option, which accepts a number of lines:
grep -nC 2 document.getElementById index.md

Search is case sensitive by default. Use the -i flag to make it insensitive.
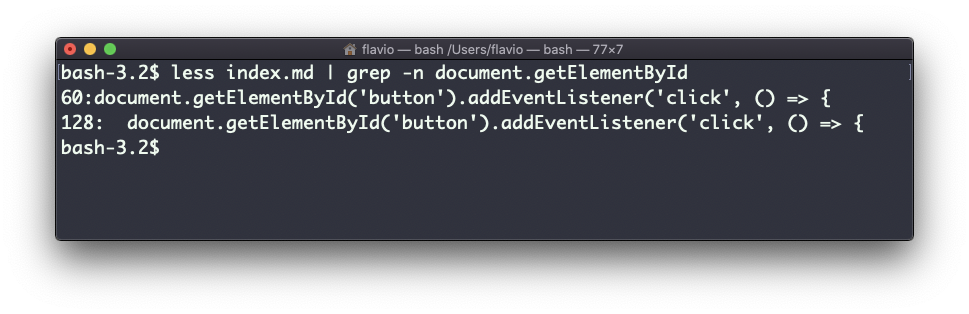
As mentioned, you can use grep to filter the output of another command. We can replicate the same functionality as above using:
less index.md | grep -n document.getElementById
The search string can be a regular expression, and this makes grep very powerful.
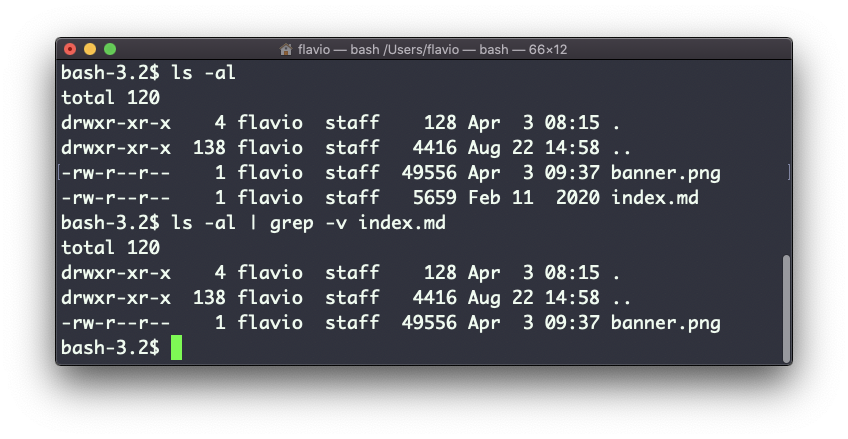
Another thing you might find very useful is to invert the result, excluding the lines that match a particular string, using the -v option:
The Most Popular Linux & Terminal Commands
The 40 Most-Used Linux Commands You Should Know